PSX Emulator Texture Packs: Easy Guide
Recent updates to PSX emulators have enabled people to create texture packs for our favorite PS1 classics. In this guide, we will walk you through all the necessary steps for those who are not tech-savvy. Previously, we wrote a similar guide on how to install texture packs on a PSP emulator.
If you are looking for a Great Classic Handheld console that supports multiple emulators, including PSX, we recommend checking out Anbernic’s Handheld Consoles.
- 1) Our first step will be to download the latest version of Duckstation or Retroarch, as they are the best and up-to-date emulators for PlayStation One, and probably the only ones that support texture pack installation and replacement right now. If this is your first time using these emulators, you will also need the BIOS files for both emulators for the respective regions. Note: Some texture packs are exclusively made for Duckstation only, and some for Retroarch. Usually, there is some documentation about this on the download page
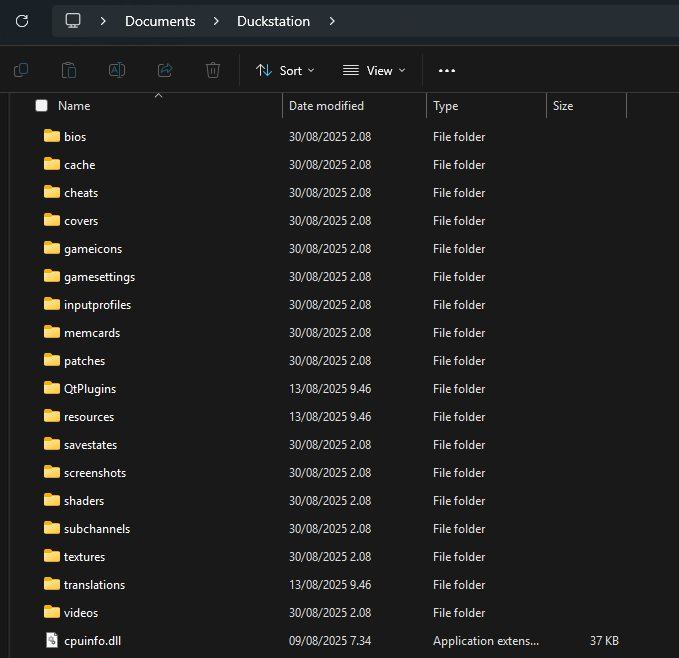
- 2) After you have installed Duckstation, you need to find the textures folder inside the Duckstation directory. In my case, it would be C:\Users\putachi\Documents\Duckstation\textures, and next we need to place our texture pack we have downloaded under that folder (not zipped, of course). Please understand that certain games that have been released in multiple regions will have a different code, like the US version of Legend of Dragoon has SCUS-94491, while the European version would be SCES-03043 instead. So, depending on what ISO you have, it has to match the same name, but you can simply rename the folder to the corresponding region of the game.
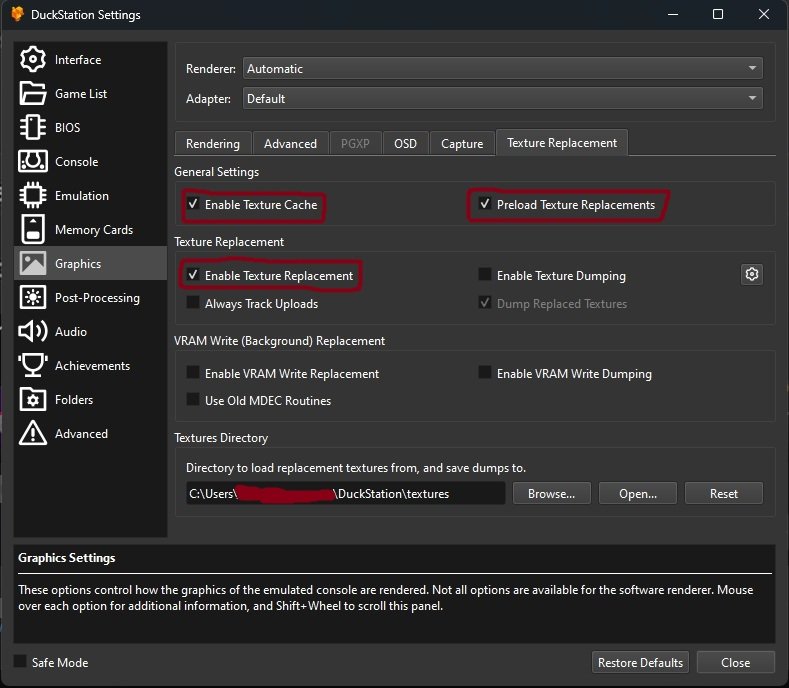
- 3) After we placed our texture pack into the textures folder, now we need to open Duckstation and go to the top corner, choose “Settings -> Graphics” and toggle the settings I have marked with red here. Preload texture replacements is an optional thing, but I find it a convenient way to deal with texture packs, as it creates fewer problems as you are running the game. Optionally, the “Enable VRAM Write Replacement” and “Use Old MDEC Routines” can be toggled on, as these might be prerequisites for certain games out there, so if the texture pack is not working, please try with them on, and you might see better results.
- 4) To improve the overall quality of the game, you can also check the “Rendering” tab under graphics. Here, you can adjust the internal resolution of the game, which will vastly improve the overall look of the game with your texture pack installed.
- 5) Proceed to close the tab and now run the game, and there should be a Duck logo with something like “preloading textures,” and after that, it jumps into the game with your HD textures enabled.
Installing Texture Packs on RetroArch / Beetle
Okay, then we are going to look for stuff for Retroarch next, and the process is going to be somewhat similar, and I think you can use the same directory for your PS1 games as with Duckstation, but texture pack locations are going to be working a bit differently here, however.
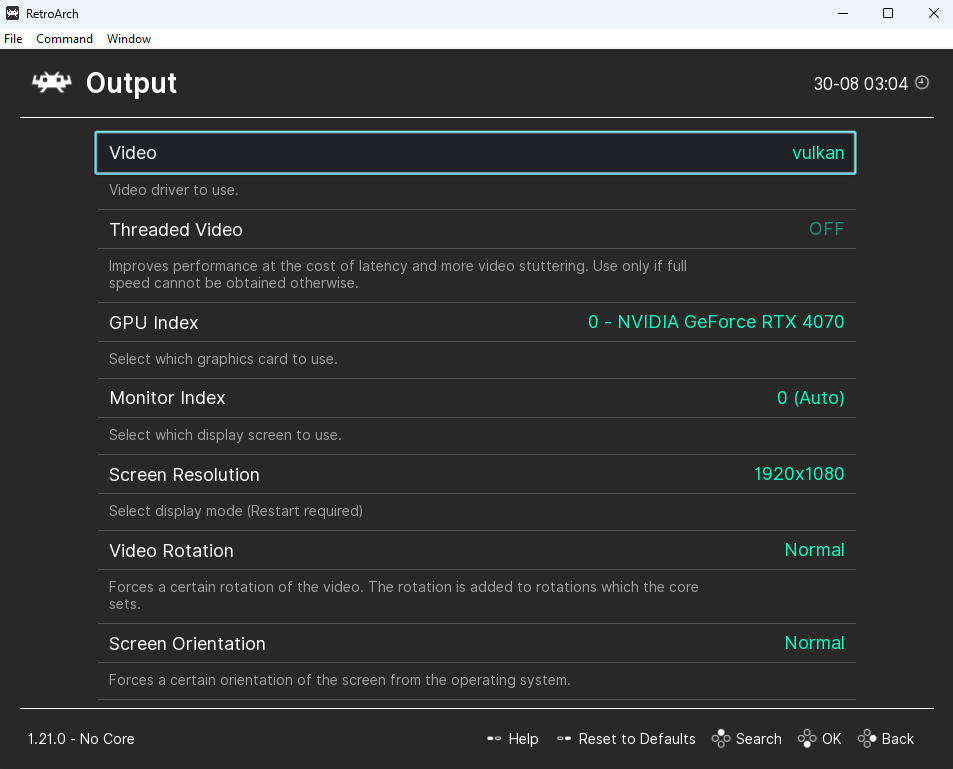
- 1) Head out to Settings > Video > Output and change the video driver to “Vulkan” as that’s the one mostly supported here, apparently. Then go back to the main menu and proceed to click restart RetroArch.
- 2) Then we choose “Online Updater” on the main menu and choose “Core Downloader”. It will take a second to load here, and now we are going to scroll down until we find “Sony – Playstation (Beetle PSX HW)” and click it so it will download it.
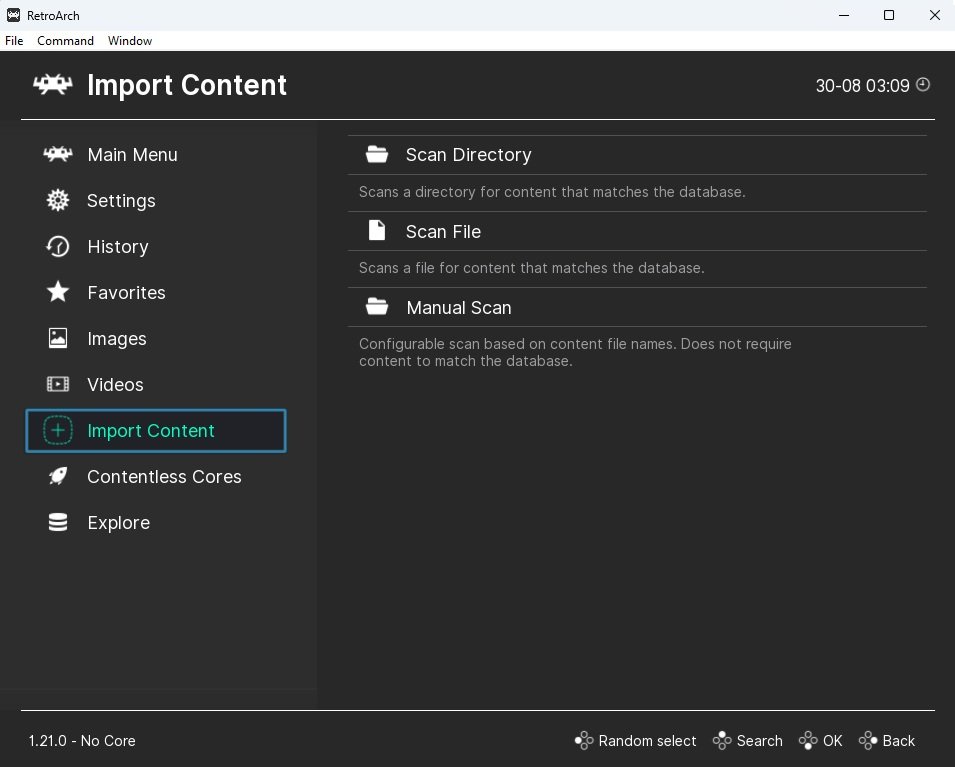
- 3) Then, on the main menu, we see the “Import content” option. This is where we choose which folder we are loading the actual games. Once again, we can choose the very same directory we use with Duckstation over here. You might want to try to do this manually and automatically, as it sometimes does not load stuff properly (In the manual scan folder, you can choose to set “content directory” to where you have your PS1 ISO files stored, and this should help)
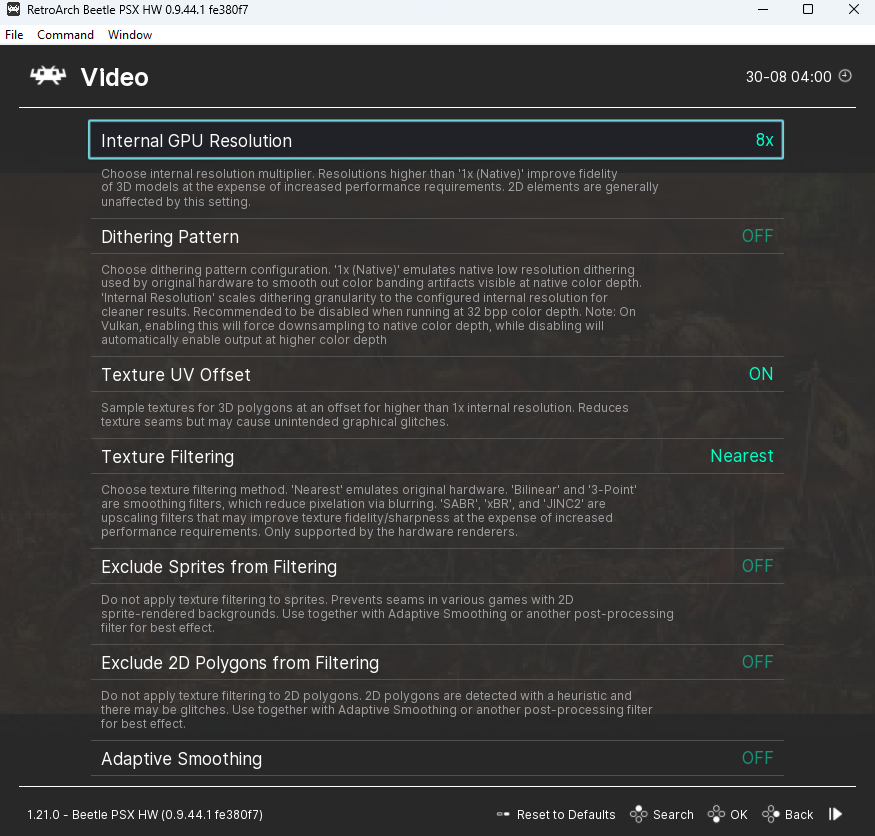
- 4) Proceed to launch the game and then press F1 this will open up a menu and here we are going to choose “Core Options > Video” here we can adjust Internal GPU Resolution to higher resolution preferrably 8x or above depending on your PC strength. Then we switch off “Dithering Pattern” and scroll down until we find “Track textures” and set this to ON. Then go backwards one tab and choose “Emulation hacks” turn on “Skip BIOS”.
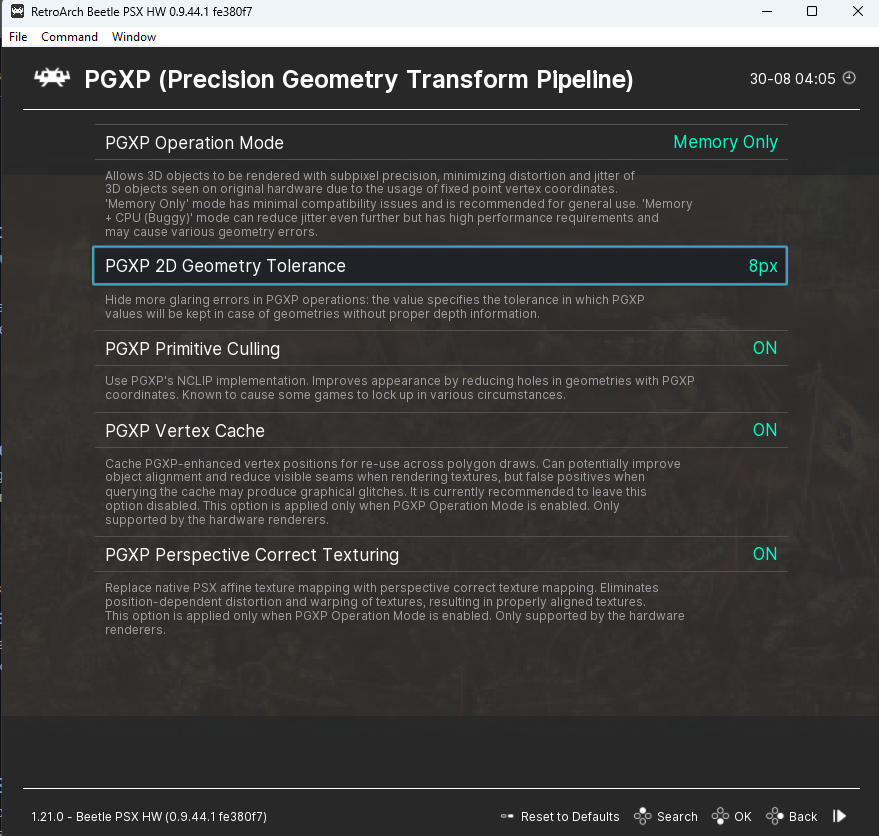
- 5) Then we go back again and choose PGXP tab and here choose the settings as i have on image above. So everything on and Geometry tolerance set to 8px and operation mode should be at Memory only here.
- 6) Go back once more and scorll down to see “Renderer” this needs to be changed to Vulkan or in some cases the AUTO might actually work, but just incase lets go with Vulkan. Then continuing to scroll down we see “CD Loading speed” and we set this to 8x then hit backspace and scroll above to choose “Close Content”.
- 7) Finally run the game again and press F1 and proceed to choose “Core Options > Video” and scroll down until you find “Replace textures” and turn it on. Once again choose close content and reboot Retroarch.
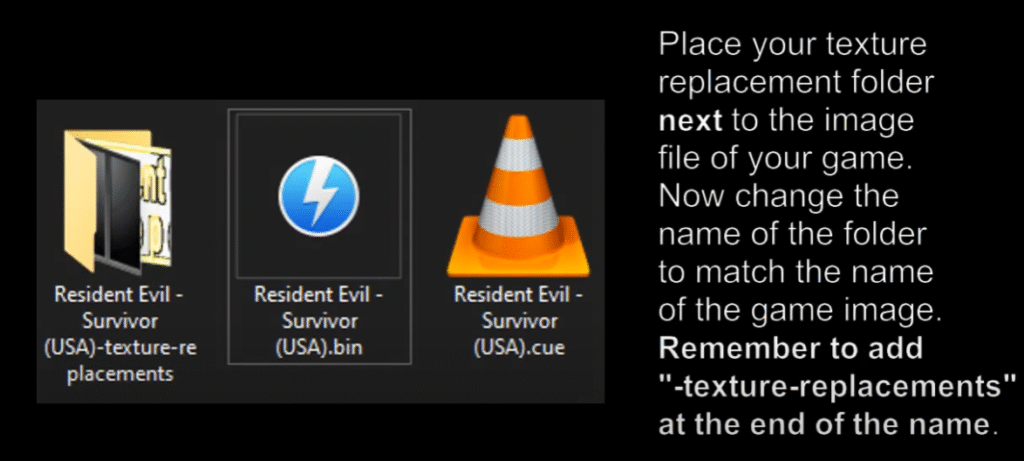
- 8) Now we need to move our texture pack to same folder where the .cue (ISO file) is located at and make sure to type in “-texture-replacements” at the end of that folder. After this your texture pack should be working as intended and you can toggle it on/off middle of the game to see the difference in quality.
That pretty much sums up our tutorial how to set texture packs on PS1 emulators, it may be obvious but the duckstation is less complex and faster to do as there is less settings and steps involved out of the two emulators. If you have any questions about installing and replacing texture packs on playstation 1 games, all you gotta do is leave a comment below and maybe i can find a solution.

